Seedlings can be purchased, of course, but for many reasons you may wish to start your own plants. By starting your own seeds, you have a much greater selection of flowers, vegetables and herbs to choose from. Old favorites like hollyhocks and less common varieties of herbs and perennials might not be available as plants. We offer a large selection of seeds including many hard-to-find Heirloom varieties. Plants with fine seeds should also be started indoors because they can easily wash away in the rain and they may have a difficult time competing with weeds.
CONTAINERS
Traditionally, seeds are started in flats or peat pots. We carry various sizes of plastic trays, peat pots and the popular Jiffy-7, a flat, peat-moss wafer. When moistened, the Jiffy-7 expands to form a small, self-contained pot of soil into which a seed is sown directly. This is an excellent choice when sowing seed of plants that do not like their roots disturbed during transplanting.
SOIL
It is best to use a light, soilless mix . These mixes are sterile and contain adequate nutrients to carry seedlings through until its time for transplanting. Do not use garden soil, as seeds will not germinate well in the heavy soil, and a fungus disease called damping off is common.
TEMPERATURE
Most seeds require warm soil in order to germinate. You will need to heat the soil of the seedling flats with a heat mat. Seed trays can also be placed on top the refrigerator or hot water heater. Do not put seed-starting trays on a windowsill; nighttime temperatures are too cool to allow for good germination. Seeds need consistent warm temperatures of 75 degrees or warmer for optimum germination.
MOISTURE
Seeds need to be kept constantly moist in order to germinate. Moisten the soil thoroughly before planting. Water when the surface is dry with a centrospray/superfine foggit nozzle or plastic spray bottle until the soil is saturated. The medium should be constantly moist, but not soggy. It is important not to overwater, but also not to permit the flat to dry out.
SOWING YOUR SEEDS
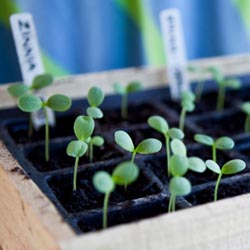
Seeds should be sown 2 to 10 weeks before the last spring frost date. Your seed packet will provide this information. Fill your containers almost to the top with moist growing mix. Tamp it down gently and smooth it out. Gently press the seeds into the mix or simply set them on the surface of the soil and place a fine layer of seed starting mix over the top to prevent damping off. Cover the container loosely with a clear dome. Be sure to label your containers with plastic or wood plant stakes and write the plant name and the date sowed. Set trays in a warm spot and check daily to keep evenly moist. Heating mats are the perfect choice for promoting seed germination by warming the soil.
CARING FOR YOUR SEEDLINGS
Once seedlings have grown a half-inch or so, you should water less frequently. Let the soil dry slightly between watering. Seedlings will also need light and the best method is to use the traditional fluorescent fixtures. Suspend lights just an inch or two away from the plants. Lights must be on at least 14 to 16 hours a day. As your seedlings grow, raise the lights accordingly. If your seedlings do not get enough light, they will become weak and spindly. Fertilize seedlings weekly with half-strength, balanced, organic fertilizer. A fish and seaweed blend works well. Thin seedlings if they become overcrowded.
HARDENING OFF & PLANTING OUT
When the weather is warm, move your seed trays outside gradually over a five to seven day period. Start by putting them out for a few hours, and then gradually increase until they are left out all day and night. Keep them in a lightly shaded, protected spot during the day to prevent sunburn. After you have “hardened off” your seedlings, gently transplant into the garden. Try not to handle the root ball too much, as they are quite fragile. Water thoroughly after transplanting and again every day for about a week. Newly setout plants will look sparse at first, but they will grow and fill in quickly!


